
We’ll dive into an in-depth comparison of these two models, highlighting their differences to help you decide which is the right one for your home aquarium.
The Fluval FX2 external canister filter has been designed to fit in between the 407 and the FX4.
Having owned, and been extremely happy with, a Fluval 407 for some time, I will share with you my thoughts.
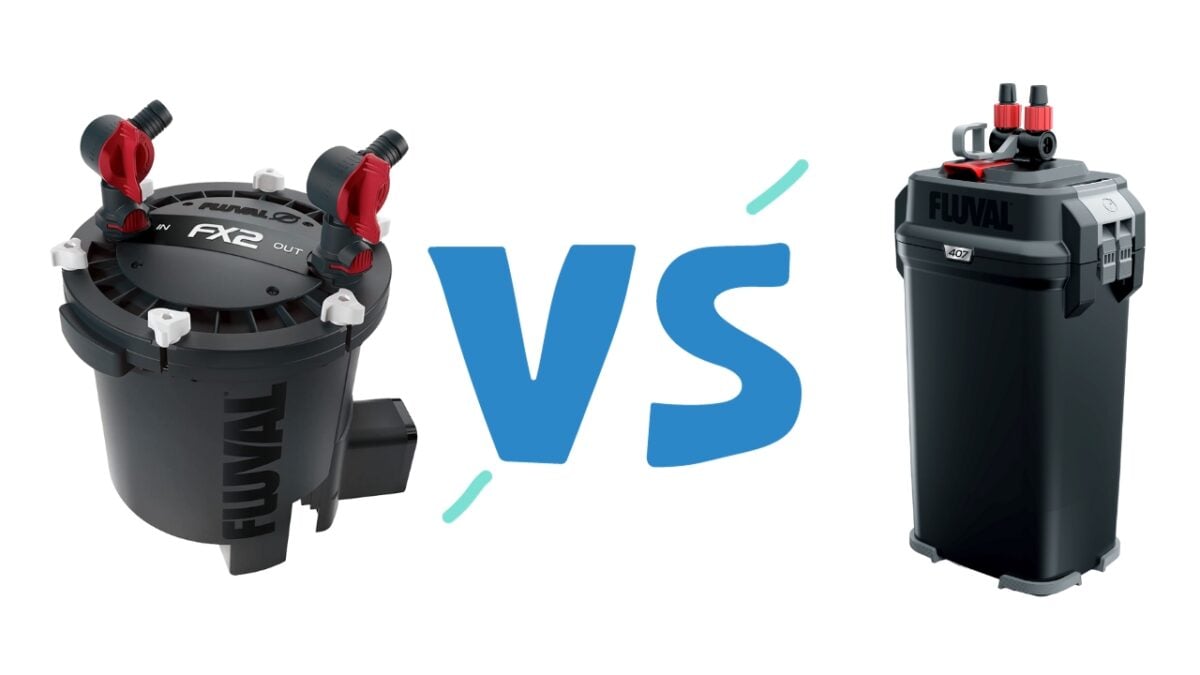
Fluval FX2 vs 407: What’s The Difference
First the quick version.
You may notice my tank size suitability figures differ from what Fluval states.
I’ve done a chart further down explaining how I work this out.
| FLUVAL FX2 | FLUVAL 407 | |
| Tank Size | Up to 95 Gallons (360 Liters) | Up to 75 Gallons (284 Litres) |
| Pump Output | 475 g/ph (1,800 l/ph) | 383 g/ph (1,450 l/ph) |
| Filter Media Capacity | 2.5 gallons (9.5 liters) | 1.1 gallons (4.2 liters) |
| Power Consumption | 120V – 27 Watts / 230-240V – 27 Watts | 120V – 23 Watts / 230-240V – 20 Watts |
| Annual Running Cost (Approx) | $35.50 | $30.24 |
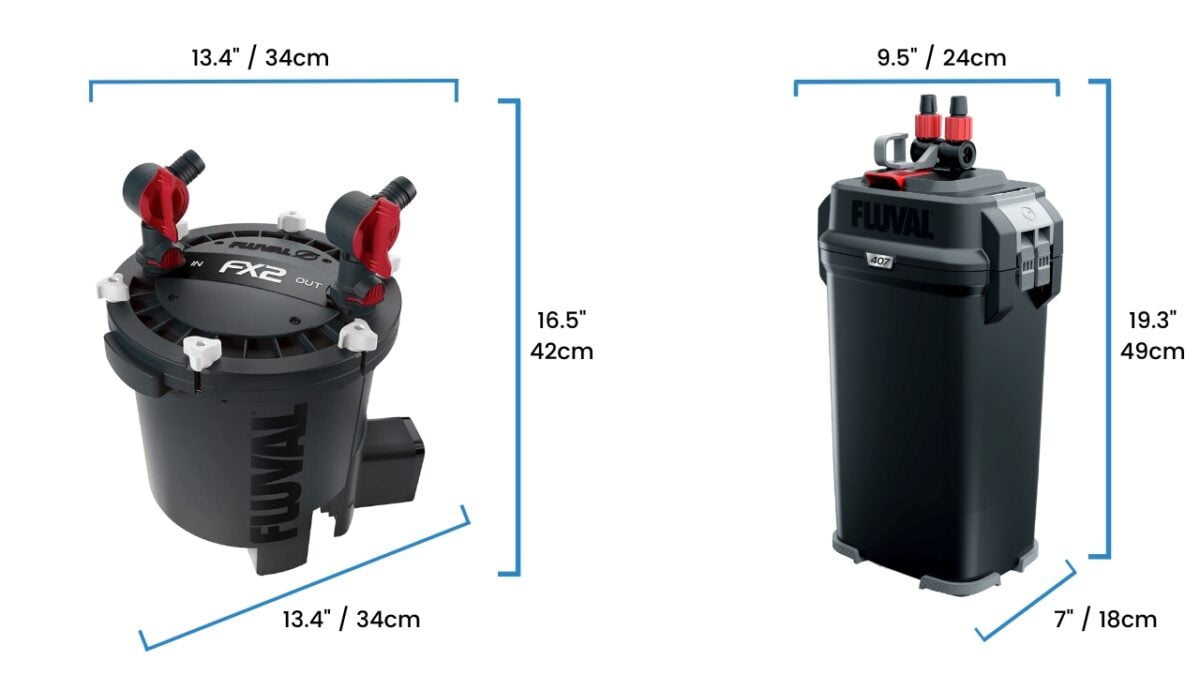
| Dimensions | H 16.5″ x L 13.4″ x W 13.4″ | H 19.3” x L 9.5” x W 7” |
| Filter Media Included | 4 x Bio-Foam pads, 1 x Bio-Foam + pad, 1 x Carbon Foam pad, and 2 x bags BioMax rings | 2 x Bio-Foam Max pads, 2 x Bio-Foam pads, 2 x Bio-Foam+ pads, 4 x bags carbon, 2 x bags BioMax rings, and 2 x Quick Clear pads |
Both filters are a breeze to set up and maintain (details and tips on how to do this further down).
Here are the Fluval FX2 dimensions and Fluval 407 dimensions, so you can check they will fit.
So, what it comes down to is:
- Tank size: The Fluval FX2 canister filter is best suited for tanks up to 95 gallons, while the Fluval 407 is suitable for tanks up to 75 gallons.
Fluval states the FX2 is suitable for tanks up to 175 gallons which is much more than what I’ve said, putting it on a 175-gal aquarium would only give you a turnover rate of 2.7 rather than the recommended 5. - Size: The Fluval 407 is 2.8” taller than the FX2, so if you’re tight on space you may struggle to fit it beneath an aquarium. But, if you’re tight on space width ways, the FX2 is 3.9″ longer and 6.4″ wider than the 407.
- Filtration capacity: The Fluval FX2 offers a higher filtration capacity with a circulation rate of 475 gallons per hour compared to the 407’s 383 gallons per hour.
- Energy efficiency: The Fluval 407 is the more energy-efficient option that can potentially save you money on your bills in the long run.
I’m sure the FX2 will be a damn good filter, it’s a Fluval after all, but having said that…
My thoughts are you’re best to choose either the 407 or upgrade to the FX4.
Why? For me the FX2 isn’t as good value for money, it’s not massively better than the 407, so I’d save some bucks and go for the 407 if you have a tank of around 75 gallons, whereas the FX4 is significantly better than the 407 & FX2, it has almost double the turnover rate than the 407, 50% more space for filter media than the FX2 and has a drain valve which makes water changes so much easier, especially on heavy bulky filters like the FX range.
The FX2 isn’t a bad filter at all, it’s just that it’s closer to the 407 in performance rather than in the middle, where it’s generally priced….but if you can grab it on sale it’s worth buying!
Fluval 407  | Fluval FX2  | Fluval FX4 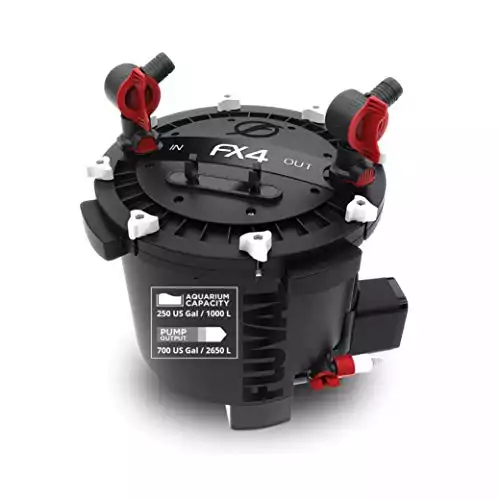 |
4.6 | 4.5 | 4.6 |
383 g/ph (1,450 l/ph) | 475 g/ph (1,800 l/ph) | 700 g/ph (2,650 l/ph) |
Suitable for aquariums up to 75 gallons (284 liters). | Suitable for aquariums up to 95 gallons (360 liters). | Suitable for aquariums up to 140 gallons (530 liters). |
$229.99 | $269.97 | $309.99 |
Suitable for aquariums up to 75 gallons (284 liters).
Suitable for aquariums up to 95 gallons (360 liters).
Suitable for aquariums up to 140 gallons (530 liters).
What Size Canister Filter Do I Need?
A general rule of thumb is that you want the pump output (gallons per hour) to be 5 times the size of your tank, so multiply the size of your tank by 5 to find out the g/ph that is ideal
I’ve found that following this simple calculation stops you from buying a filter that is too small or too large (and wasting money) for your aquarium.
If you have an overstocked stocked tank that has a large bioload, it’s recommended that you multiply your tank size in gallons by 10, to find a suitable turnover rate for your tank.
Since there is no standardized calculation used by all the different manufacturers, each manufacturer may suggest a different tank size suitability for their ‘XXX’ g/ph filter.
By using this formula, you can standardize the process and compare filters from different manufacturers on an equal basis.
| TANK SIZE (GALLONS) | NORMAL STOCKING LEVELS | HEAVILY STOCKED TANK |
| 20 | 100 g/ph | 200 g/ph |
| 29 | 145 g/ph | 290 g/ph |
| 40 | 200 g/ph | 400 g/ph |
| 55 | 275 g/ph | 550 g/ph |
| 75 | 375 g/ph | 750 g/ph |
| 90 | 450 g/ph | 900 g/ph |
| 100 | 500 g/ph | 1000 g/ph |
Most manufacturers state the g/ph when the filter is empty with no media in place.
Once the media is in place (and it’s got gunked up after a while!), these g/ph figures reduce drastically and the real-world turnover rate will probably be around 50% less.
Nonetheless, I’ve found that choosing filters based on these calculations is more than sufficient for keeping my tank water clean and clear.
Fluval 407 vs FX2: Detailed Comparison
Now for those who like every last detail, buckle up, we could be here a while.
Tank Size
Based on my calculation chart….
The Fluval FX2 canister filter is suitable for tanks up to 95 gallons, which is considerably less than the 175 gallons that Fluval says. Putting it on a 175 gal would only give you a turnover rate of 2.7 rather than the recommended 5.
The Fluval 407 is suitable for tanks up to 75 gallons.
Type Of Fish You Keep
Different fish require different levels of filtration. Some fish are particularly messy so you need to make sure your filter can cope with them.
I’ll list a few common messy fish and if you keep any of these guys you may be best choosing the FX2. Because it has a higher water turnover rate and capacity for filter media to catch the additional mess, it will keep your water cleaner.
Bristlenosed Pleco – Although these guys are part of a tank’s clean-up crew and do a great job of eating algae and leftover food, all that algae and food have to come out the other end!
Cichlids – In particular large cichlids like Oscars, who are known to rip up plants, stir up the substrate, and even re-arrange rocks, all creating lots of mess.
Goldfish – These guys love to dig around and stir up the substrate and are known for pooping a lot, so you need a filter that can cope.
Turtle – If you keep a turtle instead of fish in your aquarium, you may need a much more powerful filter to deal with the amount of waste they produce, check out my turtle filter guide for more info.
Freshwater and Saltwater Compatibility
Both the Fluval FX2 and 407 external canister filters are designed to work in freshwater and saltwater aquariums.
Filter Media
Both filters come with all the filter media you need which includes all 3 stages of filtration.
Mechanical Filtration Media
Mechanical media catches all of the debris in the water, if you’ve got loads of stuff floating around in the water, it’s time to rinse out those filter pads!
Biological Filtration Media
Biological filtration uses beneficial bacteria to consume highly toxic ammonia and nitrites, turning it into safer nitrate, which you then reduce with water changes and by having live plants.
Ceramic rings and bio balls provide valuable extra surface area for beneficial bacteria to colonize, aiding in breaking down these harmful toxins, and keeping your nitrogen cycle in check, helping keep the water safe for your fish.
Chemical Filtration Media
Activated carbon helps remove chemical impurities, odors, and discoloration from the water, keeping it crystal clear and smelling sweet, no one wants their tank to smell like rotten eggs!
Activated carbon needs to be replaced regularly as it will stop working, aim to replace it after a month.
Important: Carbon also removes medications, so remove all activated carbon filter media when treating your fish with medication.
The Fluval FX2 comes with the following filter media:
The carbon foam and bio-foam+ below are correct for the FX2, although it doesn’t say so on the packaging yet, I presume this is down to the FX2 being a fairly new filter and the packaging will be updated soon.
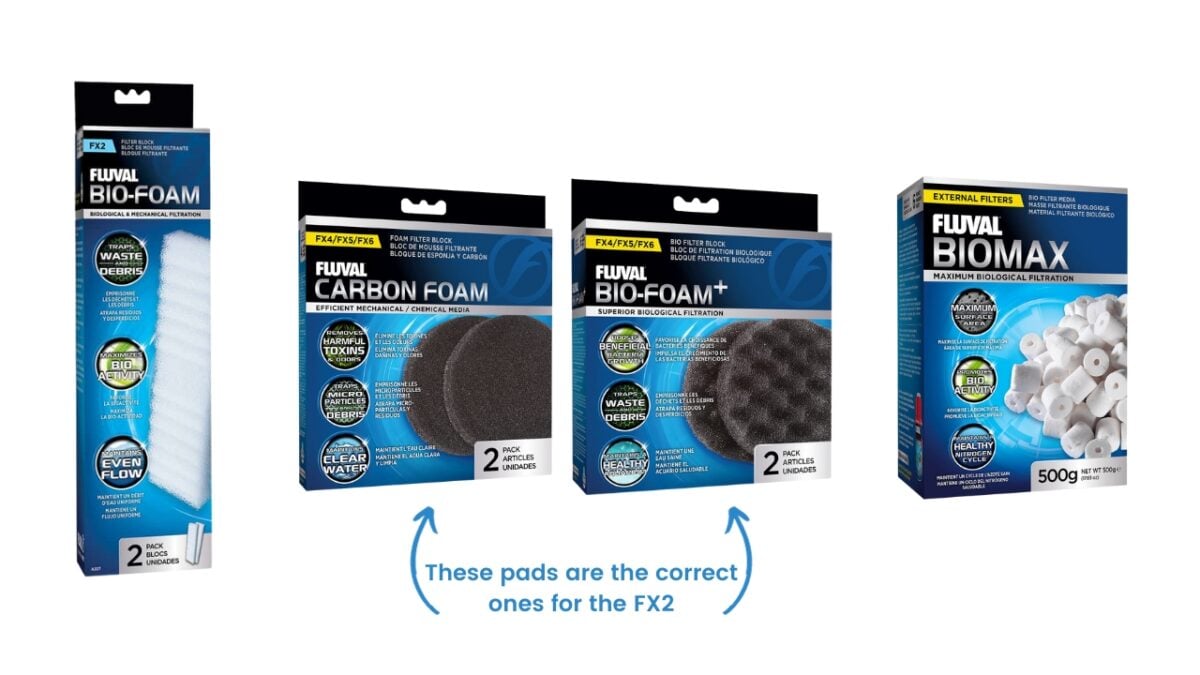
- 4 x Bio-Foam pads
- 1 x Carbon Foam pad
- 1 x Bio-Foam + pad
- 2 x bags BioMax rings
The Fluval 407 comes with the following filter media:

- 2 x Bio-Foam Max pads
- 2 x Bio-Foam pads
- 2 x Quick Clear pads
- 2 x Bio-Foam + pads
- 4 x bags of carbon
- 2 x bags BioMax rings
Fluval FX2 vs 407 Setup and Installation
Both filters are easy to set up and install.
Fluval FX2 Setup and Install
I’ve included a video here as it’s often much easier to watch before reading an explanation.
You’ll need a flathead screwdriver for the hose clamps and a knife for cutting the tubing.
As with all canister filters, although they arrive ready with the filter media inside, you have to take the canister apart and check everything is present and correct.
Firstly, unwrap the tubing from around the outside of the canister body and remove the cellophane beneath it. I hate disposable plastic, why companies still use so much of it I don’t know!
Unscrew the 6 grey screw locks, remove the filter lid, and lift out the stackable filter media baskets using the 2 red lifting handles. I do really like that Fluval has made it so simple to remove filter media this way instead of having to repeatedly dunk your hands in dirty fish poop water!!!
On the top is a leaflet which needs to be removed. You need to separate the 2 white baskets as each of them has a red tray in the center with a plastic bag full of BioMax ceramic rings. You’ll also find yet another disposable plastic bag containing 2 additional empty filter media bags.
I always rinse new filter media when I get it home to remove any dust, especially the ceramic rings.
Both bags of ceramic rings will fit into a single red tray. You could order another bag of BioMax rings to fill the other red media tray.
More media = more surface area to colonize beneficial bacteria = less ammonia and nitrites in the water.
Once you’ve made sure everything is where it should be and you’ve rinsed the filter media, reassemble in the reverse of taking it apart.
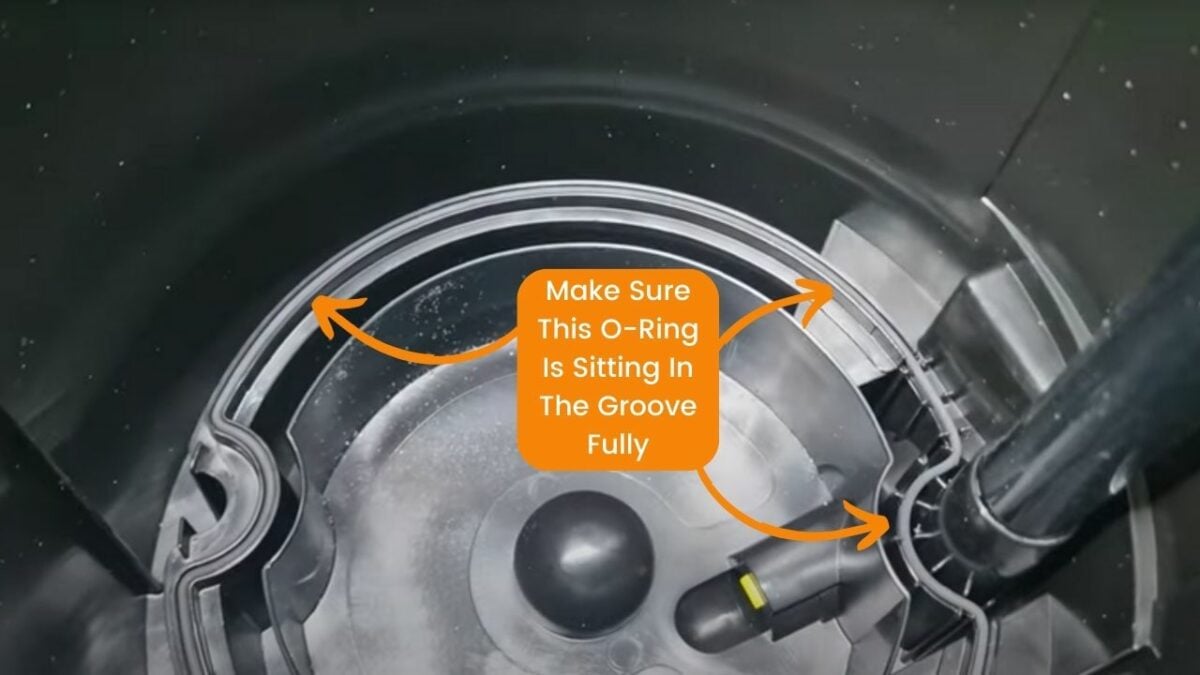
Rubber O-rings are something I mention a lot in my canister filter posts, and I’m going to again (no one wants leaks!)
While the canister is empty, check the O-ring in the bottom of the filter is properly sat in the groove (see the image below) then check that the O-ring in the filter lid is in place properly too. This will prevent any unwanted leaks.
Position the filter as close to your aquarium as you can to avoid any sharp bends or turns in the tubing.
Canister filters are ‘gravity fed’ so they need to be below the tank for them to work correctly. You can put a canister filter at the side of a tank, but the top of the filter must be below the surface of the water.
It can be tricky to get the filter working efficiently, but as long as the top of the FX2 is at least 8 inches below the surface of the water you should be fine.
Put the media baskets back inside the filter and add 1.4 gallons (5 liters) of dechlorinated water into the canister.
Fit the canister lid and retighten the screw locks. Don’t overtighten as you may damage them.
Top Tip: Don’t tighten them up in a circle. Think of it as a clock face, tighten the screw at 12 o’clock, then tighten the screw directly opposite at 6 o’clock.
This ensures you get even pressure on all of the locks and the filter lid, and avoid damaging any of them.
Next up fit the AquaStop Valves.
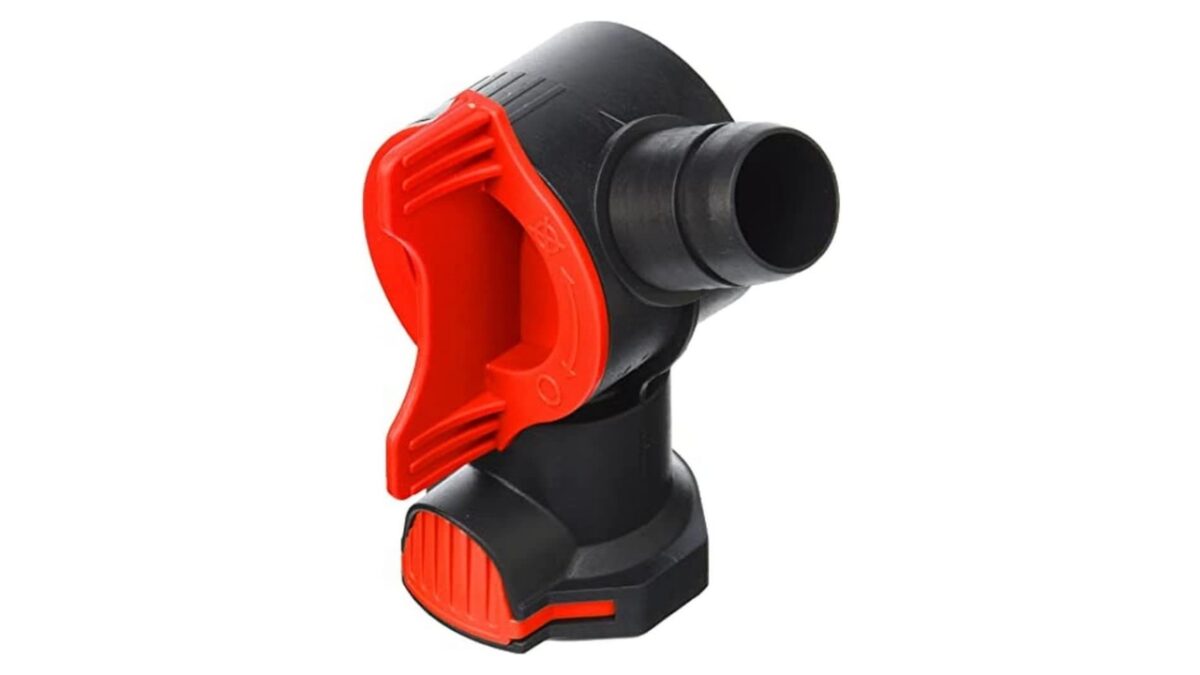
They simply press on and when you hear a click, you’ll know they’re attached to the filter lid.
Now fit the rubbery end of the input and output hosing to the AquaStop valves, securing them in place with the hose clamps and a flathead screwdriver.
Next up is fitting the brackets to your aquarium.
Remove the 3 clips, and place the 2 brackets over the top of your aquarium with the lip to the inside of the tank (see image below)
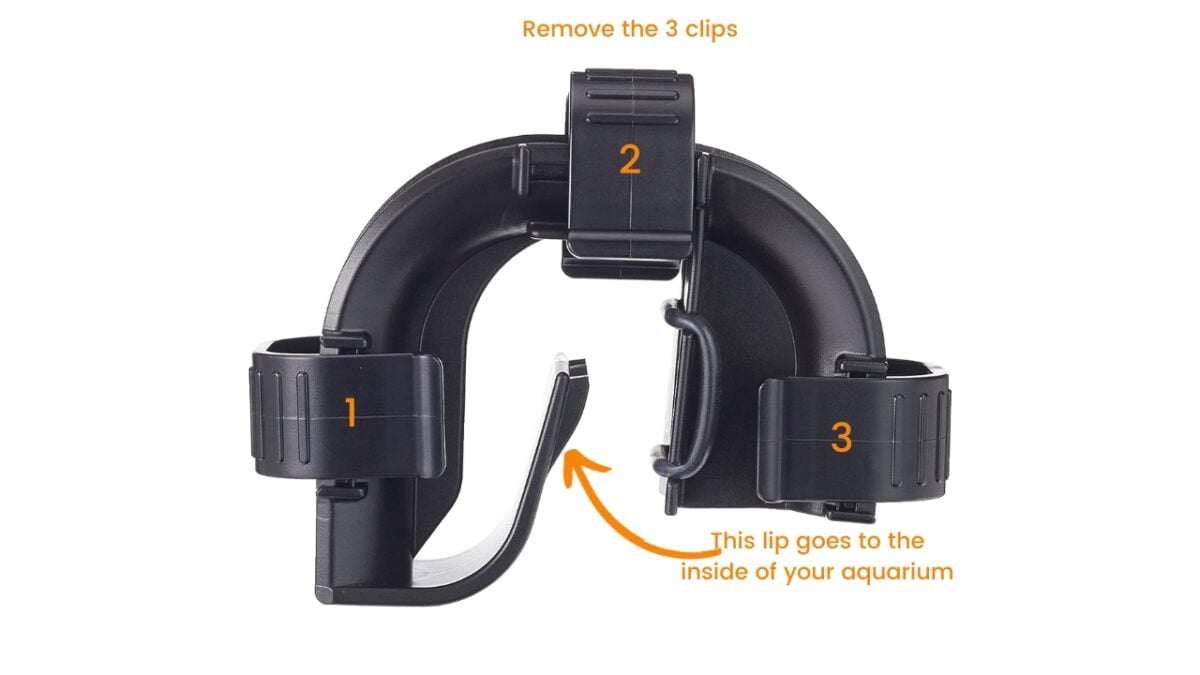
Now cut your input and output hoses to the correct length, allowing at least 6″ beyond the rim of your aquarium.
Install your intake and output assemblies. The intake and outlet valves on the filter are clearly marked. Ensure the input strainer is at least 3″ above the bottom of your tank.
Move the valves (red disc on AquaStop valves) into the open position and plug the filter into the mains power to start your filter.
Don’t think you’ve got a duff filter when the pump stops after 1 minute. It will stop for 2 minutes and then restart again. It’s programmed to do this.
The filter will fill with water and then purge the trapped air out of the canister.
The FX2 will purge any air from inside every 12 hours so don’t be alarmed when it’s doing so.
It may be a bit noisier than you expect when you first switch it on, but it will settle down. This is normal for a new canister filter.
Fluval 407 Setup and Install
I’ve again included a video for ease.
One thing I really like about the entire Fluval 07 series filters is that setting them up is a breeze.
Again, the 407 arrives assembled, but you have to take it all apart as there’s a leaflet inside the canister, the filter media comes sealed in plastic bags, as does the rubber gasket seal that goes between the canister and lid.
The ceramic rings can get a bit dusty during shipping, so make sure you rinse them thoroughly to get all of the dust off them.
For heavily planted tanks, you may want to avoid using activated carbon as it will filter out all the nutrients in the water that your plants thrive off, it will also soak up any plant fertilizer you add. You could fill the top media baskets with some extra ceramic rings instead.
Putting it back together is the exact reverse of taking it apart.
Inside the canister are tracks molded into the sides to form different compartments. The filter media baskets and frame that hold the Bio-foam and Bio-foam Max pads will only fit back inside one way.
Top Tip: When you’ve put the Bio-foam+ and quick clear pads back in the bottom tray put the red lifting handle through the basket at this point.
It’s much easier to stack the rest of the baskets on top of each other with the handle in place rather than inserting the handle once you’ve stacked the baskets on top of each other.
Install the rubber gasket on the filter lid.
Like the baskets, the canister lid will only fit one way too. The 407 badge on the front of the lid fits into a notch molded into the rim of the canister body.
The hose clamps do a great job of keeping the intake and output hoses in place and are a much better design than those on the FX series filters.
When it comes to fitting the hose clamps to your tank, all I’ll say is: read the instructions first (or watch the YT video above)…I’m a typical guy, instruction manuals must not be read at all costs, I will struggle and tear my hair out first!!
Basically, there are 2 parts to the fittings, the clamp that fits onto the tank, and the cover that secures the piping in place.
The covers need to be fitted vertically. The rear part of the clamp and the pipe cover slide together using tongue and groove moldings. The underside of the curved part of the cover then clips onto the curved part of the clamp.
Aquastop Valve
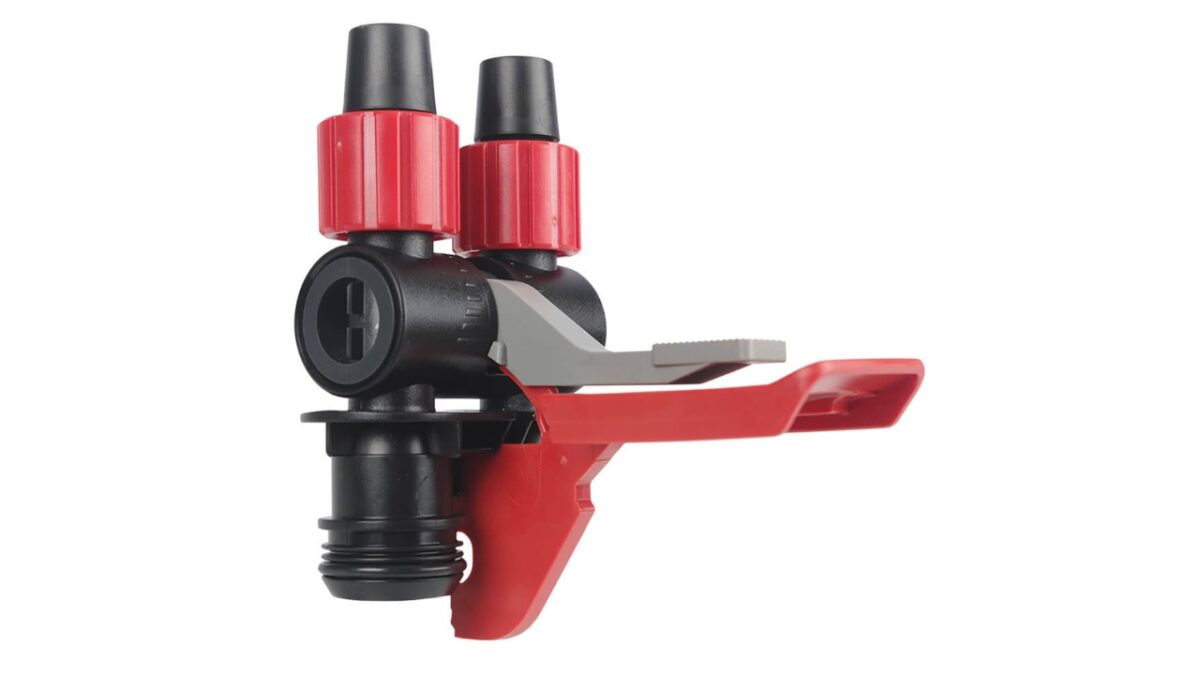
The Aquastop valve is a key feature of the 07 canister filter range.
This valve allows you to stop the water flow and then detach it from the filter in one piece, making cleaning and maintenance waaaaaaaay easier.
To install the Aquastop valve:
- Place the Aqua stop valve on the inlet and outlet ports on the top of your canister filter and press the red lever down to lock it in position.
- Lift the grey lever up so it’s vertical to put the valve in the OFF position.
Placement
Place the filter on a flat and sturdy surface, beneath your fish tank.
Canister filters are ‘gravity fed’ so they need to be below the tank for them to work correctly. If you put a canister filter at the side of a tank, the top of the filter must be below the surface of the water, but it can be tricky to get the filter working efficiently.
Position the filter as close to your aquarium as you can and avoid any sharp bends or turns in the tubing.
Fit The Tubing
The intake and output hose is supplied in a single length that you have to cut yourself.
To avoid miscutting my pipe the wrong length (come on, we’ve all done it!) I find it easier to attach both ends of the pipe to the valves at this point, then cut it once I know it will reach over the top of the tank and back into the water.
If you do miscut the tubing, it’s not the end of the world, you can get a replacement length of Fluval ribbed hosing.

Regardless of which filter you pick, the included hardware is the same. The intake assembly is 13.75” (35cm) in length so you’ll need to account for that when trimming the intake pipe.
The Aquastop valve is clearly marked which side is the intake and outlet so you can’t get this wrong.
The output nozzle does a decent job itself, but you can add the Fluval Spray Bar Kit, to help eliminate surface scum and aerate the water.

Priming
To prime the pump:
- Make sure your output nozzle is above the water’s surface so it has access to air.
- Press the grey lever on the Aquastop valve downwards so it sits on top of the red lever.
- Move the priming handle up and down 3 or 4 times until you can hear the filter filling itself with water.
Once the canister filter has filled with water, plug it into the mains power and you should have water flowing out of the outlet nozzle.
That’s it, you’re all set up and good to go.
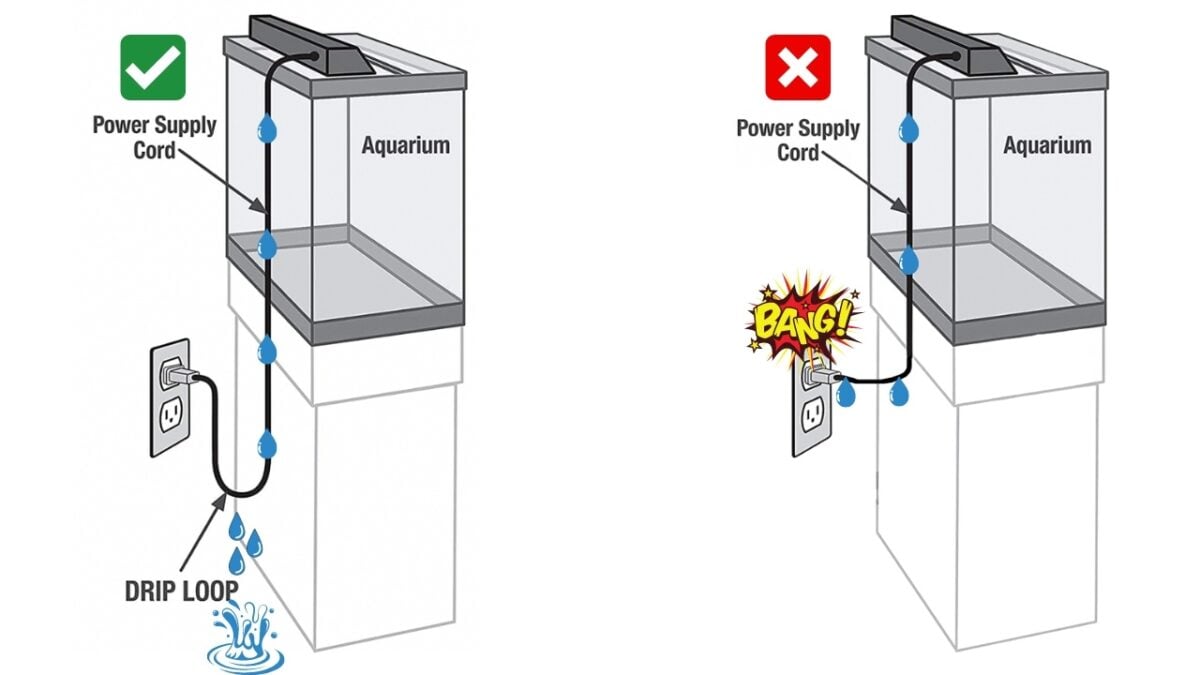
I always recommend having a drip loop on all electrical items for your aquarium, we all know water and electricity are not a good match!
Filtration Performance
They’re both Fluval’s, so both do an awesome job of cleaning your aquarium water.
The FX2 can hold more filter media than the 407 so should do a better job, but I can vouch for the 407 being no slouch too, and keeps my water crystal clear.
Maintenance And Cleaning
The golden rule with cleaning filters and filter media is never to use tap water to clean your media. Tap water contains chlorine that will kill the beneficial bacteria that have colonized your media.
Fluval FX2 Cleaning
Unplug the filter from the mains power and turn both AquaStop valves counterclockwise to put them into the closed position.
I recommend at this point that you have a tub nearby that is big enough for the filter to be put into and a towel to hand.
Press and hold in the red clip at the bottom of the AquaStop valves and pull upwards to remove them. You’ll get a bit of water dripping out of the valve, not much, but you’ll be glad you’ve got that towel now!
If you buy the FX2’s bigger brother, the FX4, you can drain the water from the canister directly into the tub using the filter’s drain valve, a great feature that the FX2 is missing unfortunately.
Place the filter inside the tub and unscrew the filter locks, again unscrewing the lock directly opposite the one you’ve done as opposed to going around in a circle, and remove the filter lid.
Lift me media basket out of the filter using the red lifting handles, pour the water from the canister into the tub, and place the canister to one side. You could add some water from your aquarium at this stage if you wanted.
Give your filter media a thorough cleaning in the water in the tub to get all the trapped gunk and detritus off. Don’t forget to give the baskets a rinse too.
Once you’ve cleaned everything you can put the filter media back where it belongs, making sure you pull the outer foam pads all the way down to the bottom of the baskets the whole way round so you don’t leave any gaps for water to pass through without being cleaned.
You can clean inside the canister if you need to, and check the bottom seal is still in place.
If you want to check the impeller you’ll need a Phillips head screwdriver to remove the impeller and pump assembly off of the canister.
The impeller is the white part that sits inside the cover and just pulls out. You can also clean the impeller housing with a bottle brush while you’re at it.
Time to reassemble the filter and reconnect it to your aquarium. I won’t tell you how to put everything back together again, we’ve been through that already.
Reconnect the AquaStop valves, open the inlet valve first, then the outlet valve, and plug back into the mains power.
Just like when setting up the filter from new it will run for around a minute, shut down, purge the trapped air out of the system, and then restart again.
That’s your FX2 cleaned, an absolute breeze of a job.
Fluval 407 Cleaning
Like the FX2, the 407 is also super easy to clean, but it’s a slightly different process.
Disconnect the filter from the aquarium and unplug: Lift the grey lever on the Aquastop valve so it’s vertical, this puts it into the off position and stops the flow of water. Unplug from mains power. Lift the red lever to disconnect the Aquastop valve from the filter.
Put a towel and bucket on the floor and empty the water from the filter into the bucket. You’ll then use this water to clean everything.
Remove the filter lid by pulling the grey lift-lock motor head clamps outwards and then push down on them until the lid releases.
The EZ-Lift media baskets can be removed with one finger using the red handle.
Clean the mechanical filter media: Gently squeeze the sponge or foam media in the bucket to remove larger debris and waste particles, you don’t need to get them spotless.
Inspect and rinse the biological media: Check the ceramic rings or bio-balls for any accumulated debris and gently swish them in the same bucket to remove surface dirt.
Replace the chemical filter media as needed: Chemical media has a limited lifespan and should be replaced according to the manufacturer’s recommendations or when you notice a decline in water quality.
Clean the filter’s impeller and housing: Over time, debris and slime can accumulate in this area, resulting in reduced pump performance.
The impeller is located under the red cover on the underside of the lid. Remove the impeller and gently clean it in the bucket and wipe out the housing where the impeller sits with a cloth.
Clean the main body of the canister where the filters go: Add a bit of water and swish it around to loosen any brown sludge in the bottom and pour it into the bucket.
Finally, using a bottle brush clean the input and output nozzles to remove any buildup or debris. These nozzles pull apart easily so you can get into all the nooks and crannies.
Reassemble and reconnect the filter: Once everything has been cleaned, reassemble the media baskets, fit the lid, and reconnect the pipes by pulling down the red lever and then the grey lever, you will hear a flow of water as your filter re-fills (if you don’t hear water flowing, pump the primer a few times).
Once your filter has filled up plug it back into the mains power.
Top Tip: When you put the lid back on, push it down firmly all the way around before clipping the grey brackets in place, this ensures you have a nice tight water seal and avoids any leaks.
You will need to lubricate the rubber o-ring occasionally using a silicone based lubricant.
Pump Performance and Efficiency
When you’re looking to choose a new canister filter, the filter’s pump performance and energy consumption are important things to consider with the ever-increasing cost of living.
Pump Output and Circulation
The Fluval FX2 has a filter circulation rate of 475 gallons per hour (1,800 L/h), making it suitable for aquariums of up to 95 gallons.
On the other hand, the Fluval 407 has a lower circulation rate of 383 Gal/h (1,450 L/h), making it suitable for aquariums of up to 75 gallons, or for a heavily stocked smaller aquarium.
Energy Efficiency

We’re all feeling the pinch at the moment with ever-increasing energy prices.
The Fluval FX2’s power consumption is 120V – 27 Watts / 230-240V – 27 Watts
The Fluval 407’s power consumption is 120V – 23 Watts / 230-240V – 20 Watts
The approximate annual running cost of each filter is:
- Fluval FX2, based on $0.15 per kWh = $35.50
- Fluval 407, based on $0.15 per kWh = $30.24
Price
I expect the Fluval FX2 to have a higher price point than the 407, unless you can grab yourself a great deal.
Fluval 407 | Fluval FX2 |
4.6 | 4.5 |
383 g/ph (1,450 l/ph) | 475 g/ph (1,800 l/ph) |
Suitable for aquariums up to 75 gallons (284 liters). | Suitable for aquariums up to 95 gallons (360 liters). |
$229.99 | $269.97 |
Suitable for aquariums up to 75 gallons (284 liters).
Suitable for aquariums up to 95 gallons (360 liters).
Closing Thoughts On Fluval 407 vs FX2
You’ll be extremely impressed with whichever of these filters you buy.
So, which would I choose?
Well, that’s easy. Like I said in my introduction, I’d either take the 407 or upgrade to the Fluval FX4.
I’ve had a 407 for a long time now and am super happy with it, I wouldn’t upgrade it to an FX2 unless I could get it at a bargain price.
There’s nothing wrong with the FX2, it’s a darn good filter, and the online reviews will tell you as much.
It’s just the FX4 has the drain valve, a higher flow rate, and a larger filter media capacity and doesn’t cost much more comparatively.
Check out the equipment section for more comparisons and setup guides like this one, and the aquarium health section for guides on keeping your finned friends happy and healthy.
